OneLogin
To configure SSO with OneLogin, you can use the available Postman app. You must be an administrator in both OneLogin and Postman to configure SSO for your team.
Configuring SSO with OneLogin
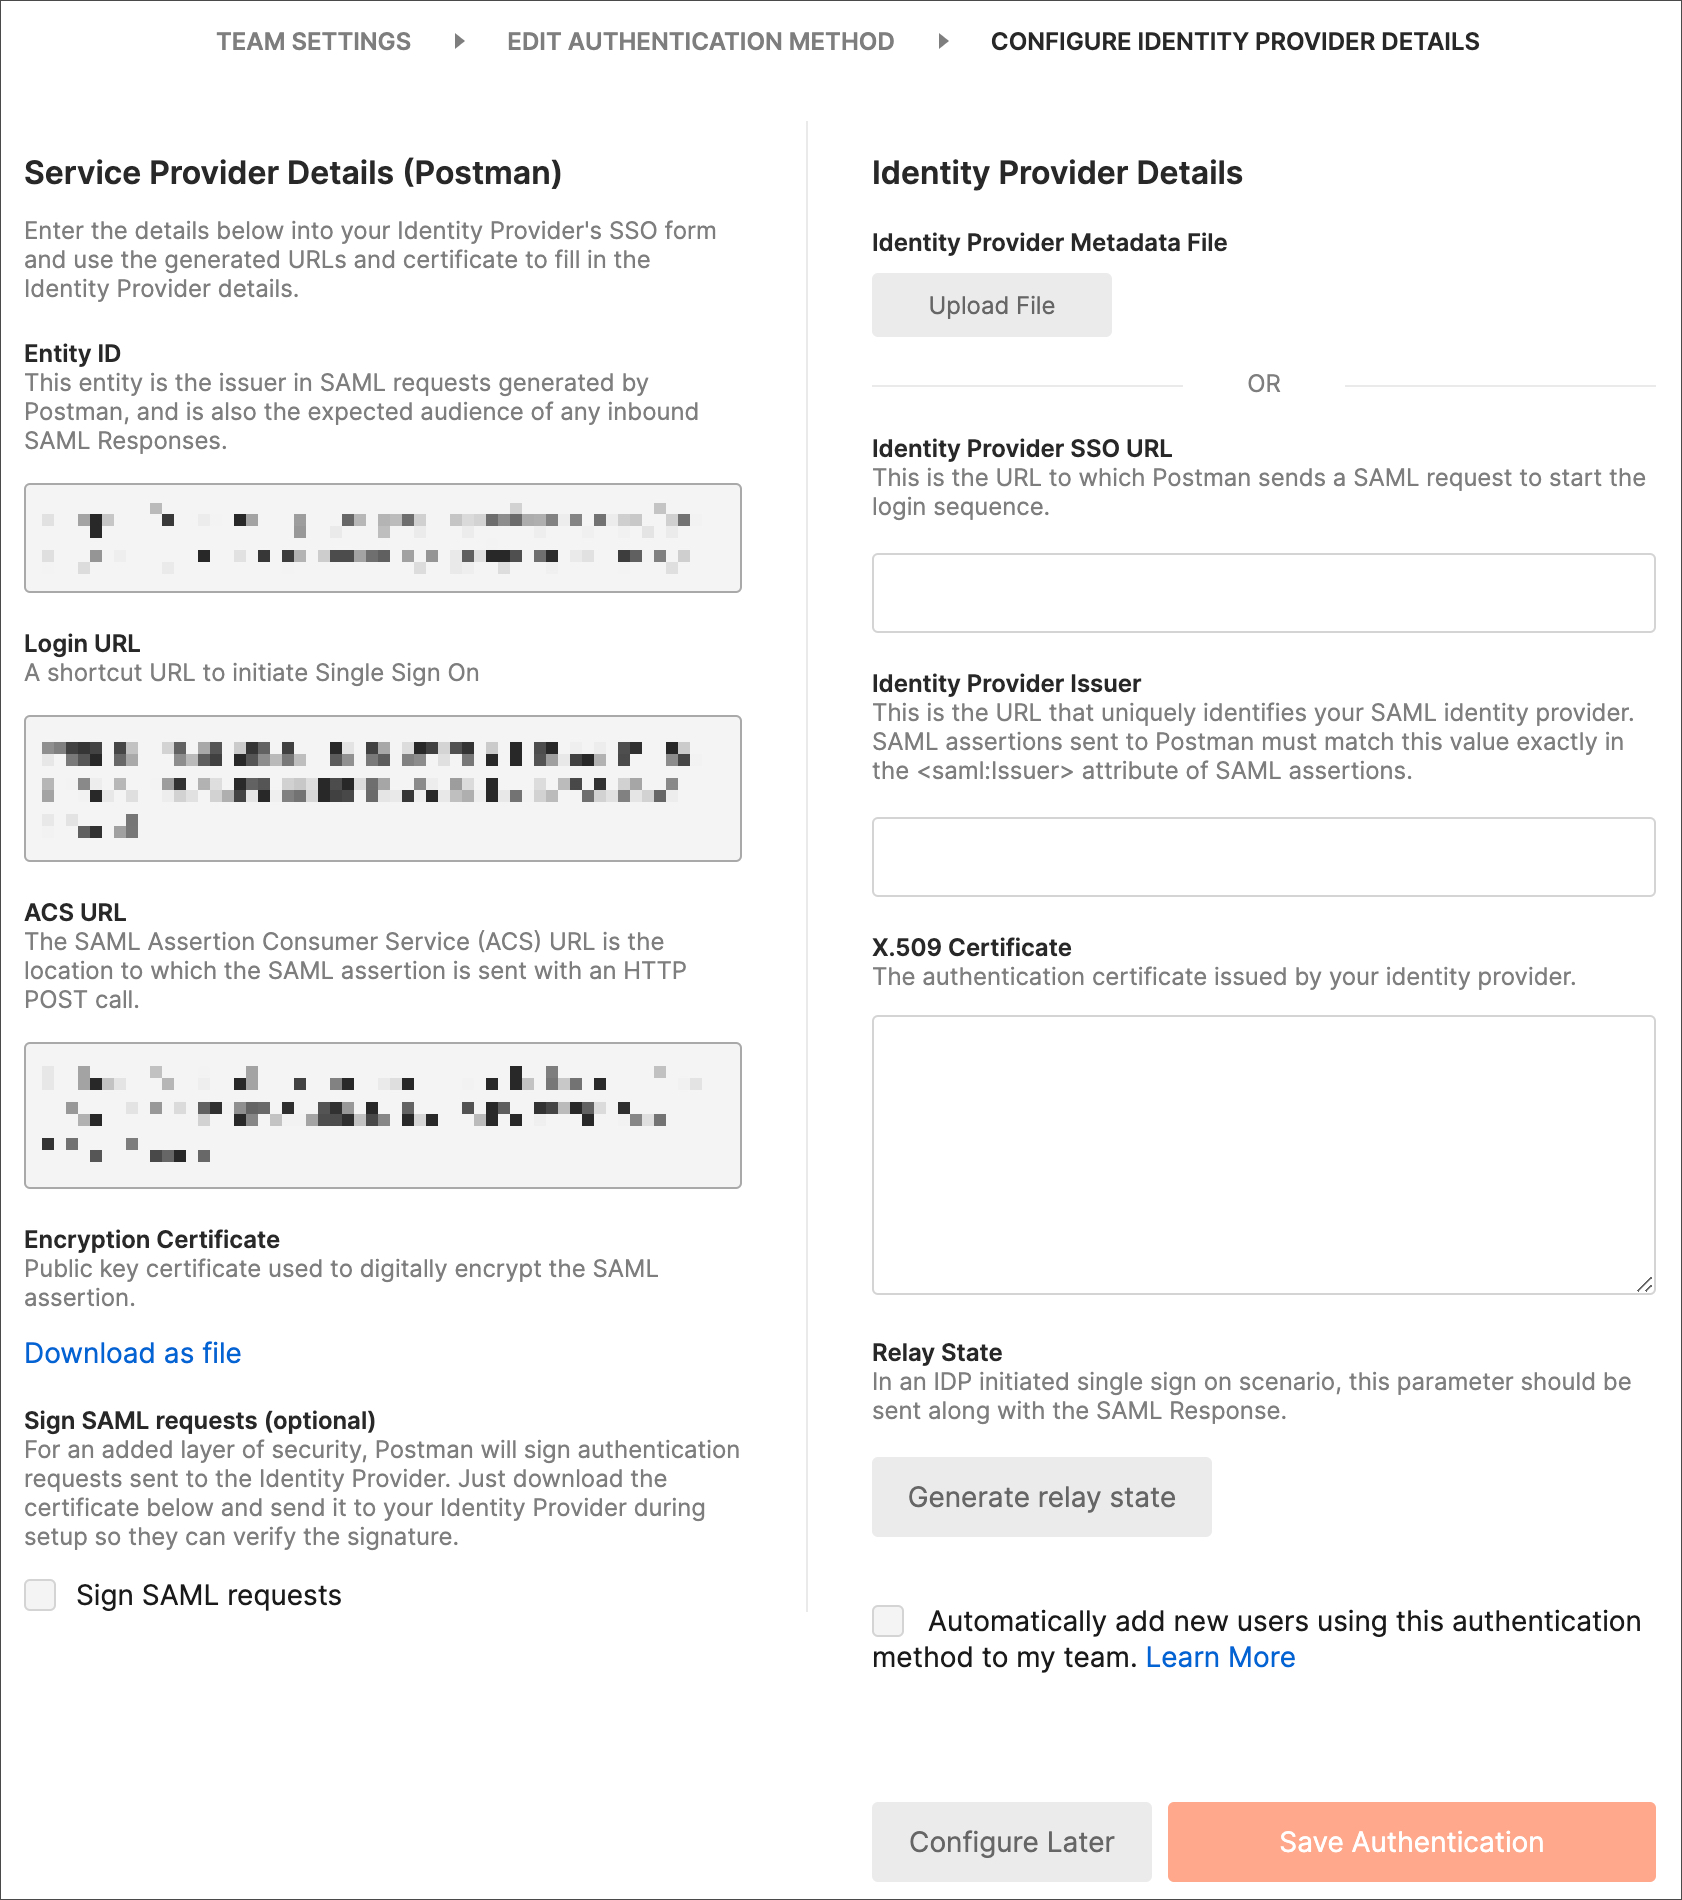
Before configuring the Postman app in OneLogin, you must configure SSO in Postman. When choosing the Authentication Type, select OneLogin. Name your authentication and Proceed.
To continue configuring your Postman app, do the following:
-
Open your OneLogin admin console in a new tab.
-
Go to Applications and select Add App.
-
Search for "Postman" and select the Postman app from the results.
-
Select Configuration on the left.
-
Take the ACS URL from Postman and add it as your SAML Consumer URL in OneLogin.

-
In Postman, select Generate relay state and add the generated value as the SAML RelayState in OneLogin.

-
Select SSO on the left in OneLogin.
-
Copy the Issuer URL and add it as the Identity Provider Issuer in Postman.

-
Copy the SAML 2.0 Endpoint (HTTP) and add it as Identity Provider SSO URL in Postman.
-
Select View Details under X.509 Certificate. Copy the X.509 Certificate and add it under X.509 Certificate in Postman.
-
Select Save Authentication in Postman to complete the configuration.
If you encounter any issues, confirm you've added and saved the correct configuration values on both Postman and OneLogin. Contact Postman support for further help.
Next steps
Now that you have set up SSO with OneLogin, you can learn about setting up SCIM provisioning:
- To learn more, visit Configuring SCIM with OneLogin. (Enterprise teams only.)
Last modified: 2022/03/16
